There are three ways to connect ceiling speakers to a Receiver. You can use a regular speaker cable to connect them, or you can use Power Over Ethernet, or you can connect them wirelessly.
Let’s walk you through the step-by-step process so that you can install them and get good coverage whenever you are listening to any audio. However, always remember that the setup should be accurate so that you can enjoy music without any interruption or random disconnection.
In This Article:
Step-by-Step Process to Connect Ceiling Speakers to Receiver
It is not rocket science to connect a ceiling speaker with a Receiver. Let’s get the materials that you would need to set up this connection – a pair of ceiling speakers, fish tape, drill, gloves, level, Flat bit, keyhole, screwdriver and wire strippers.
You must maintain all the precautions before you start the process. Turn off all the main powers. Also, this would minimize the chance of short circuits, fire hazards and inconsistent powered delivery. Try to wear protective gear for your hands and eyes.
Step 1
It is time to place the speakers accurately. You need to look for the best locations where you can place the speakers. You must place the ceiling speakers close to the listening area and to the left and right of the receiver. If you are willing to allow the surrounding sound, then you must place the speakers behind the listening area.
Step 2
Now, use the speaker cardboard insert to draw a hole in the ceiling. You can use a drywall saw to cut out the area and always check for obstruction. You must remove the drywall scraps and make this area clean so that you can place the speakers appropriately.
Step 3
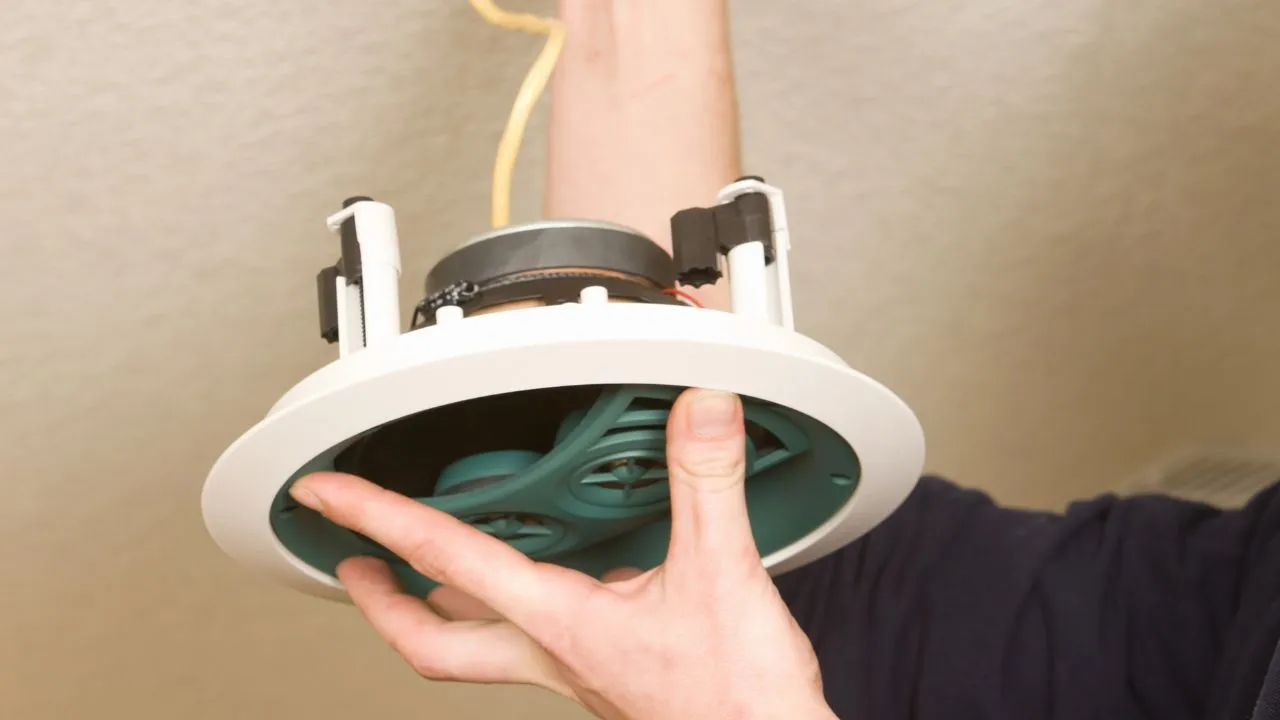
Use fish tape to connect the speaker cables from the receiver toward the first speaker. You must repeat the steps for the second cable as well. Now, check whether you need any insulation. Once all the cables are on the ceiling, strip the ends with wire strippers to expose the copper wire. Now, join one end to the receiver, and the other end of the wire should be connected to the speaker. You must always check the output and input channels to ensure the polarities, and they must be fixed firmly always.
Step 4
Always read the manufacturer’s manual while you are installing the ceiling on the hole. The guide would ensure that you do not cause any damage to the speakers and place them accurately. Use the screwdriver to tighten the screws and make the necessary adjustments. You must repeat these steps to install the second ceiling speaker as well.
Step 5
When you are done fixing the speakers to the ceiling and seal all the space using the tape. You can also paint the area for a more finishing touch. If you are not satisfied with the DIY process, then you can ask any manufacturers to do this for you. Finally, try to play your favorite audio and check whether the sound is clearly audible and enjoyable.
How many ceiling speakers are needed for a perfect setup?
Usually, you will get ceiling speakers in pairs and set them up as left and right stereo speakers. However, if you have a bigger space, then you need to balance the audio levels, and for this, you need to add more speakers, 4 to 6 would work best. If you have a square orientation, it would be just fine. Also, do consider the power ratings and number of receivers during the connection. Try to connect the speakers to the same amp to play the same sound and at the same volume. But, do remember, if you are using more than two selling speakers, then you might need more than two amps as well for playing independent music.
What should be the correct orientation for setting up ceiling speakers?
When you are setting up ceiling speakers, try to set them at an equal distance and maintain about a 2 m gap. They should be at equal space from the wall. If you find that there is not enough space, then try to use only one speaker. This would give you the best output. However, if the room layout does not have a proper positioning, then you can use speakers with an angle-able tweeter.
What kind of ceiling speakers should you get – mono or single?
Usually, ceiling speakers are designed with studio receivers, but if you have limited space, then you can go for mono amps.
What are the three main types of ceiling speakers?
The 3 main types of ceiling speakers are Passive mono ceiling speakers, Passive stereo ceiling speakers and Active ceiling speakers.
Do you need to put a fire hood for ceiling speakers to prevent fire hazards?
Yes, you must put a fire hood over the top of the ceiling speaker. Most ceiling speakers have a fire hood to prevent short circuits.
Can you place a ceiling speaker in the kitchen?
Ceiling speakers cannot handle extremely hot areas or humidity. So, it is best not to put them in the kitchen as they would degrade in their condition and can also lead to fire hazards.
Do you need a receiver for a Bluetooth ceiling speaker?
You need a receiver for a Bluetooth ceiling speaker. However, in this case, you can connect the wirelessly and ditch the requirement of wires.
Can you connect the ceiling speaker to a TV?
Yes, you can connect ceiling speakers to a TV, but it depends on the features and compatibility of the speaker with the TV. You need to use Bluetooth to prepare the connection. Otherwise, if your TV has a proper dedicated speaker output, then you can connect them through wires.