A dirty turntable needle or stylus can affect the audio quality, so you need to clean the stylus deeply and regularly before playing your favorite music. If you hear scratching or popping sounds from the record, then it’s time to clean the stylus.
Also, if you find the symptom of Record Skipping, then it indicates that the style is dirty. In this scenario, the needle can jump over certain places, causing the record to skip multiple spots. Thus, You need to apply effective measures to clean the stylus.
If every time you are trying to play the record with the dirty stylus, it can damage the record and also lead to playback issues. The only thing that can damage a stylus is prolonged exposure to dust and debris. You can clean the surface of the stylus using a brush dipped in cleaning alcohol, or you can use cleaning gel.
So, let’s walk you through the process of cleaning the Turntable needle or stylus in detail.
In This Article:
What are the main reasons for surface noise from a Turntable?
Dust and debris, damaged records, or static are the primary reasons behind surface noise when you use a dirty stylus or needle on a Turntable.
How often should you clean the stylus?
If you listen to music regularly, then you must clean the stylus once a week. Accumulation of dust depends on how often you play the records and how clean the recorder is. To prevent dirty stylus use, you must also clean the record before you start playing them.
Usually, older records show signs of layers of dust; in that case, opt for a record washer and then play them. It not only saves you a huge investment but also keeps the stylus working for years.
Things to remember
Before you proceed with the cleaning, here are a few important tips that you must consider:
- Most of the stylus lasts for a thousand hours of listening, so until and unless you are hearing any static, you must clean the stylus.
- While using a brush, you must brush the stylish in the direction of how the record moves otherwise, it can damage the stylus.
- The record might be new and appear to be clean, but always clean it before you place it on the Turntable. For this, you can use the anti-static record cleaner so that no dust or static is left behind.
- While using a stylus brush, you must also use a proper cleaning solution.
- If you listen to music every day, then you can try out a stylus-cleaning gel pad to maintain cleanliness.
4 Methods of cleaning a Turntable needle or stylus
Here, we will guide you through a step-by-step process of cleaning the stylus or needle of the Turntable:
Method 1: Clean the stylus using a brush and alcohol
You can use a soft bristle brush and a vacuum cleaner to clean the dust from the turntable. Take some liquid soap, dip a clean cloth in it, and clean the surface around the turntable. Do not touch sensitive parts with wet clothes. Otherwise, it can lead to permanent damage. Clean the rest of the parts of the Turntable using a soft, dry bristle brush.
Do not ignore the speed-selected switches, speed selectors, size selectors, control buttons, and audio outputs. Using an air compressor, you can blow the dust from the parts which are revealed. This will help to remove the stray dust. Add 70% isopropyl alcohol to the cleaning solution to remove dust from the tonearm. Use a needle rush or brush (it should have soft bristles), and clean the tip of the needle.
Always brush in the direction – back to front and apply the same method while cleaning the stabilizer. Next, clean the needle or stylus with a little brush dipped in 70% isopropyl alcohol. Finally, always dry the area after you have used isopropyl alcohol or liquid soaps for cleaning, and you are done.
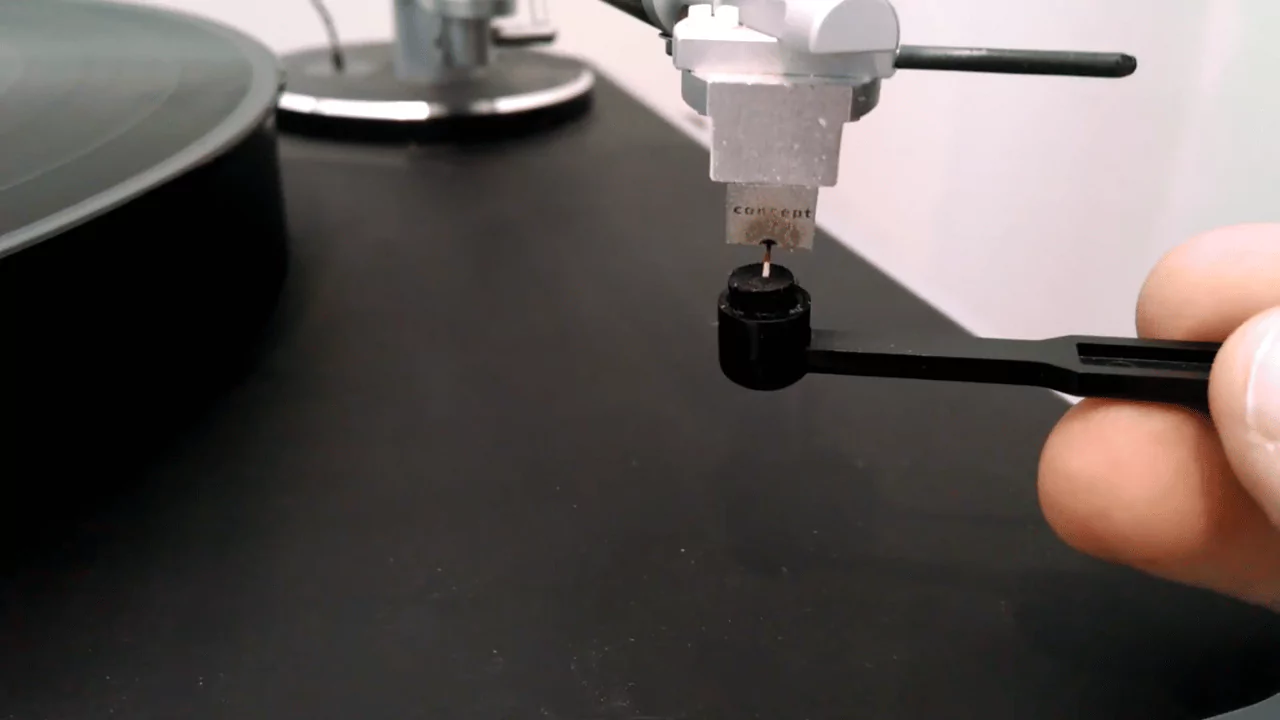
Method 2: Clean the stylus using cleaning gel
There are cleaning gels available that you can use to clean the stylus, and this is more effective than a liquid stylus cleaner. The process is quite simple, and all you have to do is follow the guidance on the package.
You have to lower the stylus onto the gel pad and repeat the process until it is clean. Check whether any kind of residues are present on the gel pad after the last clean based on the type of dust.
It might take some time to clean the stylus, but the best part is that none of the other parts are affected due to the cleaning method. However, if you want to remove the dirt, grim, and static from the disc, then you have to use a cleaning solution.
Method 3: Clean the stylus using liquid stylus cleaner
If you are debating between gel cleaners and liquid stylus cleaners, then you must go for the one that provides you with optimum sound quality. While using a liquid stylus cleaner, you must follow the instructions that are provided in the cartridge manual.
To start with, you have to use a bristle brush or a stiff brush with short bristles, and this will help in dry cleaning. From the back of the needle to the front, brush the stylus and then, in the same direction, clean the stabilizer. It is always advised to follow this process every time you play a record. Thus, you do not have to deal with musical interruption.
Now, dip the brush into the stylus cleaner and apply it to the stylus. Always be careful that the liquid should not penetrate inside the Turntable as it can lead to irreparable damage. Brush the needle in the direction mentioned above, and do not stop until the needle is clean.
Method 4: Clean the stylus using a melamine eraser
Melamine erasers, also known as Magic erasers, are available in every online store or hardware Store that helps to keep the stylus clean. You can cut off a piece of the eraser and place it on the platter so that the tonearm can easily reach it. Now, lower the stylus on the eraser and keep repeating the process until the stylus is clean.
Is it okay to clean the stylus with water?
Yes, you can use warm water with a few drops of washing liquid in it to clean the stylus, but before you proceed, you must remove the stylus from the cartridge. Also, always use a soft bristle brush to apply the solution, and never leave the stylus wet. Check that the water does not get into the interior portion of the stylus.
What is the lifespan of a Turntable stylus?
In general, a stylus can last between 200 and 2000 hours, but if you have a high-end diamond stylus, then it can last for 2000 hours. If you find that the quality of sound or music is degrading, then it is a reminder that you have to change the stylus immediately.