When you connect the MIDI keyboard to the audio interface it helps to reduce latency in any recording or performance and also allows you to keep your USB slot fee. You can simply block the MIDI keyboard into the computer to play any music, but this is not the wisest decision as you won’t be able to connect any other input or audio sources.
MIDI keyboards also come with MIDI USB capability where you have to use a USB cable, but again it creates a little hindrance.
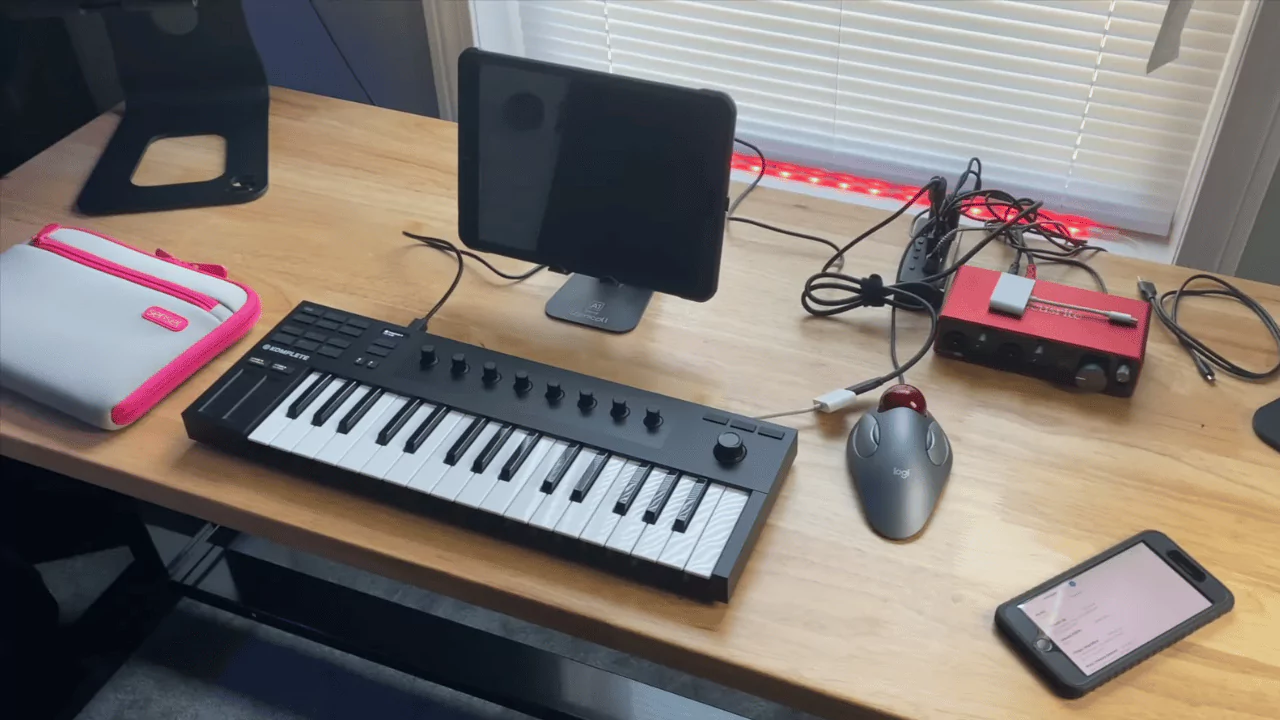
So, let’s take a look at how to connect the MIDI keyboard to the audio interface. Here you will get a step-by-step guide.
In This Article:
What is MIDI?
Musical Instrument Digital Interface also known as MIDI is a technology that allows musical equipment to connect with other devices. It helps in communicating and you can also connect to devices of different brands. Interestingly, MIDI data can also be saved within a file and you can load this and trigger sound using the software.
When talking about outputs on a MIDI keyboard, you will find different levels that have USB out, MIDI in, MIDI out, and audio outputs. So, when you are buying a MIDI keyboard, check where the audio is going to be sent and where the input and outputs are present.
All the MIDI keyboards that are being manufactured at present, have connections both for MIDI and USB, so you need to decide which would be suitable for you and proceed accordingly.
What is the advantage of using an audio interface?
Here are the reasons why you need an audio interface despite the fact that the MIDI equipment can be directly connected to the computer.
This connection saves USB or Thunderbolt ports from being used, whereas the audio interface acts as a central house. So, you can connect the MIDI device as well as the audio device and microphone before sending a signal.
The process is also quite fast and if you are using USB input, then it can cause additional latency, so the signals will get delayed and you will not get time to create the rest of the music, leading to logistic problems and recording issues.
Also, if you are using an older model, then it might not have the USB features built in. So, here you need to create a MIDI interface that can be used to effectively intake the MIDI signals and convert them, thus, the computer can read them through a USB cable.
Step for Connecting a MIDI Keyboard to an Audio Interface
There are multiple methods to connect your MIDI keyboard to different setups, based on the requirement, such as a musician or a studio engineer. So, here are the steps explained in detail:
Through MIDI cable
You can use a MIDI cable to connect a MIDI keyboard to any audio interface, even if the keyboards are pretty old. You can also use the synthesizers and still send MIDI signals using the MIDI cables. Basically, MIDI is a USB interface which is one of the best ways to connect the older equipment with any latest device.
Connect the audio interface with the computer and check whether it is able to recognize the device. You might need the MIDI driver to continue as the audio interface will use USB. Now, set the DAW MIDI input and do not mix up with the audio inputs as they are different.
Connect the MIDI output to the keyboard and next the MIDI input to the audio interface. Finally, you have to load an instrument that is capable of using the MIDI signal.
Using the MIDI Hub
If the MIDI interface does not have audio capabilities, then you can use the MIDI hub. This way you can completely focus on sending MIDI signals which would allow you to connect multiple MIDI devices with a central hub. This is set for the initiation of sending the signal.
Usually, the audio interface comes with the option to choose input MIDI but you can also find one that has more than one input. It will help you to choose the MIDI signal that you want to use for any particular project.
So, connect it to the computer and ensure it is recognized. Now, set the DAWes MIDI input and there are no audio signals on the MIDI hub. Thus, any change in the audio input won’t do much benefit.
Next, you have to connect the MIDI output of the keyboard to the MIDI input of the MIDI hub. You find that this process acts as a different channel and also takes up signals from multiple places. You can also load up an instrument in DAW and use this as a MIDI signal.
Through USB cable and DAW
This is one of the simplest ways of connecting MIDI and getting a signal into a computer. Thus, if you are trying to utilize the software solution, other than sending signals to a lot of different MIDI hardware, then the USB method is the best.
Check whether the MIDI keyboard is USB MIDI compatible and whether the MIDI signals can be carried out through a USB cable (USB A to USB B cable). But, if you are using a Mac, then it doesn’t use USB, rather it carries out signals through a Thunderbolt connection or you can also use free services that come along with Apple devices, such as Garageband.
So, to proceed, connect the keyboard to the computer and wait till it recognizes it. You might need to install the driver, either manually or automatically. Otherwise, you can also look at the manufacturer’s website to get a compatible driver and download it. Now, it is time to set the MIDI keyboard into the DAW’s MIDI input and load the instrument in DAW.
Start to use the MIDI signal and play the instrument. You will find that the MIDI signal is sent directly to the DAW. So, you do not need to carry around an interface if you want a portable setup.
When should you use a MIDI Hub?
If you have a home studio with a lot of different MIDI-equipped equipment, then using it might be a good idea. Also, MIDI is an industry-standard technology, thus, you can switch between keyboards, drum pads, or any other such instruments without having to unplug the equipment. So, simply plug the other device and you will be done.